
Most home cooks assume recipe testing is about taste. You cook it, you try it, you decide if it's good. But understanding how recipe testing works reveals something far more interesting. The recipe testing process is a structured, repeatable system designed to make sure a dish works reliably across different kitchens, skill levels, and equipment setups. Whether you're a food blogger building a recipe library or a home cook tired of inconsistent results, learning what is recipe testing and how to apply it will change how you cook and how you write about food.
Table of Contents
- Key takeaways
- How recipe testing works: the core steps
- Variables that affect your results
- Techniques to isolate variables and improve faster
- Writing instructions that actually work
- My honest take on recipe testing at home
- Start testing smarter with Ceceskitchn
- FAQ
Key takeaways
| Point | Details |
|---|---|
| Testing is more than taste | Recipe testing confirms a dish works reliably for cooks of all skill levels and kitchen setups. |
| Follow a structured cycle | A proper recipe testing process moves from initial test through iteration to final stress testing. |
| Isolate one variable at a time | Changing a single ingredient or step per test gives you clear, trustworthy conclusions. |
| Clarity matters as much as flavor | Instructions should include visual cues and logical sequencing so beginners can follow without guesswork. |
| Document everything | Detailed notes on measurements, sensory observations, and outcomes make each test genuinely useful. |
How recipe testing works: the core steps
The recipe testing process is not a single cook and a thumbs up. Professional recipe testing follows a structured cycle spanning 6 to 8 weeks, with an initial test around week three, three to four weeks of active iteration, and final stress testing in weeks seven and eight. That timeline might sound extreme for a home cook, but the underlying logic applies at any scale.
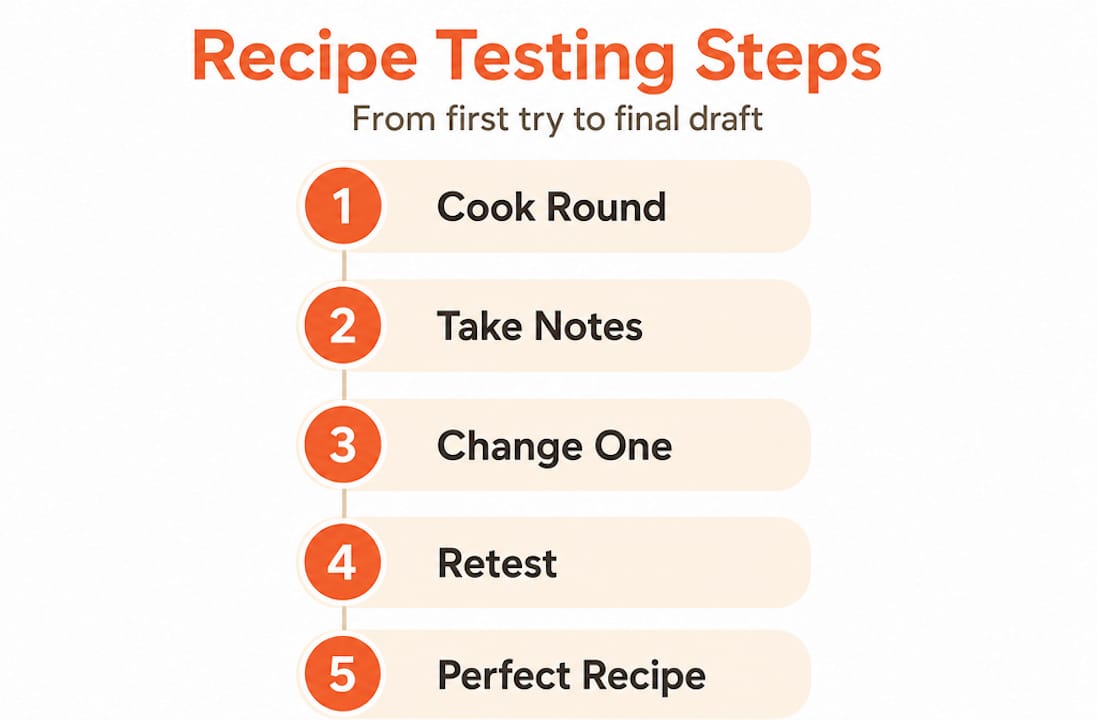
Here is how the steps in recipe testing actually unfold:
- Cook the recipe exactly as written. No substitutions, no intuition. This baseline test tells you what the recipe actually produces before you start changing anything.
- Collect data during and after cooking. Write down timing, temperatures, textures, colors, and any moments where the instructions felt unclear or the result surprised you.
- Make one controlled adjustment. If the sauce was too thin, thicken it. If the bake time felt off, adjust it. Change only one thing before you retest.
- Retest and compare. Cook the adjusted version and measure the difference against your notes from the previous round.
- Repeat until results are consistent. Testing a recipe 3 to 5 times is generally needed to confirm consistency, with more rounds required for complex dishes.
The key insight here is that each test is a feedback loop, not a finished product. You are gathering information, not chasing perfection in a single round.
Pro Tip: Take a photo at the same stage of cooking each time you test. Visual comparison across rounds catches changes in color, texture, and volume that written notes alone can miss.
A few things worth tracking in your notes:
- Exact ingredient weights, not just volume measurements
- Oven or stovetop temperature and any hot spots you noticed
- How the dish looked and smelled at key stages
- Any step that confused you or required a judgment call
Variables that affect your results
How to test recipes reliably requires more than good intentions. The physical conditions of your kitchen matter more than most cooks realize, and accounting for them is what separates a recipe that works once from one that works every time.
Professional testers standardize equipment and measure ingredients by weight, recording room temperature, oven settings, and ingredient sources to make results reproducible. You do not need a professional kitchen to apply the same thinking.

| Variable | Why it matters | Home cook fix |
|---|---|---|
| Stove type | Gas, electric, and induction heat differently | Note your stove type and adjust timing accordingly |
| Ingredient quality | Brand, freshness, and fat content change outcomes | Use the same brand across all test rounds |
| Measuring method | Volume cups are inconsistent | Switch to a kitchen scale for baking and sauces |
| Room temperature | Affects dough, emulsions, and rising times | Note the temp in your kitchen when you test |
| Humidity | Changes flour absorption and caramel behavior | Test on similar weather days when possible |
Home kitchen variability across stove types and ingredient substitutions is one of the most overlooked challenges in recipe development. A cake that bakes perfectly in 30 minutes on a gas oven might need 38 minutes on electric. If you do not account for that, your recipe fails a significant portion of the people who try it.
Pro Tip: When developing a recipe you plan to share, test it on at least two different days and, if possible, on two different stove types. This single habit will catch more problems than any other step in your process.
Techniques to isolate variables and improve faster
This is where recipe development techniques get genuinely interesting. The biggest mistake home testers make is changing too many things at once. You swap the flour, reduce the sugar, and add an extra egg in the same round. When the result is better or worse, you have no idea which change caused it.
Changing multiple variables simultaneously invalidates your results. Isolating one change per test is the only way to draw clear conclusions.
Here is how to apply this at home without wasting half your grocery budget:
- Use micro-batching. Micro-batches let you test ingredient or technique tweaks on small quantities, cutting waste and speeding up your iteration cycle. Testing a new spice ratio on a quarter batch of cookie dough costs you almost nothing.
- Score your results. Structured scoring with a 1 to 5 scale for salt, texture, brightness, and richness gives you something concrete to compare across rounds instead of relying on memory.
- Use blind tastings when possible. Ask a family member or friend to taste two versions without knowing which is which. People's opinions shift dramatically when they know which version you prefer.
- Write sensory notes immediately. Aroma fades, texture memory is unreliable. Write your observations within two minutes of tasting.
If you want to see how this kind of careful iteration plays out in practice, the bakery-style cookies guide on Ceceskitchn walks through the kind of incremental adjustments that produce consistently excellent results.
Pro Tip: Keep a dedicated recipe testing notebook or a simple spreadsheet. Label each round with a date, the single change you made, and your score. After five rounds, patterns become obvious.
Writing instructions that actually work
A recipe can taste perfect and still fail the people who cook it. This is the part of the recipe testing process that most home cooks and food bloggers skip entirely, and it is the reason so many published recipes frustrate readers.
Testing through a beginner's eyes means checking for logical step order, clarity issues, and the presence of visual cues that tell cooks what to look for rather than just what to do. "Cook until done" is not a cue. "Cook until the edges are set and the center no longer jiggles when you shake the pan" is.
Here is what to look for when reviewing your own instructions:
- Logical sequencing. Does each step set up the next one? If you ask someone to preheat the oven in step six but they need it hot in step three, the recipe is broken.
- Visual and tactile cues. Words like "golden brown," "firm to the touch," or "pulling away from the sides of the pan" give cooks something to verify without relying on timing alone.
- Dish and equipment clarity. Confusing step sequences and unnecessary extra dishes frustrate home cooks and reduce the chance they finish the recipe successfully.
- Assumption audits. Read every step and ask: would someone who has never made this dish understand exactly what to do? If the answer is no, rewrite it.
A useful exercise is to hand your written recipe to someone who has never made the dish and watch them cook it without helping. Every moment they pause, look confused, or ask a question is a clarity failure in your instructions. This is uncomfortable but invaluable. For more on writing approachable instructions, the comfort food cooking guide at Ceceskitchn is a good model of clear, accessible recipe writing.
My honest take on recipe testing at home
I spent years thinking I was testing recipes when I was really just cooking them repeatedly and hoping they got better. The shift happened when I started treating each round as a data-gathering exercise rather than a cooking session. That sounds clinical, but it actually made cooking more interesting, not less.
The most surprising challenge I ran into was my own impatience. When a dish was close but not quite right, I wanted to fix everything at once. Slowing down to change one thing per test felt painfully slow at first. But after a few weeks, my notes started telling a story. I could see exactly which change improved the texture or fixed the seasoning. That clarity is worth the patience.
The other thing nobody tells you is how much your kitchen environment matters. I once spent three rounds convinced my bread recipe was broken before I realized I had been testing on unusually humid days. Humidity was absorbing extra moisture into the flour and throwing off the hydration. Once I noted the conditions and adjusted, the recipe clicked.
Recipe testing builds real confidence. Not the kind that comes from cooking the same five dishes forever, but the kind that comes from understanding why a recipe works. Once you know that, you can adapt, substitute, and create without fear. If you are curious about what happens when you start breaking the rules intentionally, why I stopped following recipes exactly explores that mindset shift in depth.
— Michael
Start testing smarter with Ceceskitchn
If this article has you thinking about your own recipes differently, Ceceskitchn is built for exactly this kind of cooking curiosity.
Ceceskitchn combines community-created recipes, smart recipe generation, and practical cooking guidance designed for home cooks who want reliable results. Every recipe on the platform is developed with the kind of clarity and rigor this article describes. You can review the editorial standards behind how recipes are written and tested, or jump straight into the kitchen with the recipe generator to start building and refining your own dishes. Whether you are developing your first shareable recipe or refining a family classic, Ceceskitchn gives you the tools and inspiration to cook something worth remembering.
FAQ
What is recipe testing?
Recipe testing is a structured process of cooking a dish multiple times to confirm it produces consistent, reliable results across different kitchens and skill levels. It covers taste, texture, clarity of instructions, and adaptability to different equipment.
How many times should you test a recipe?
Most recipes need 3 to 5 test rounds to confirm consistency, with more rounds needed for complex baked goods or multi-component dishes.
Why should you only change one variable per test?
Changing a single ingredient or step per round lets you identify exactly what caused a change in the result. Adjusting multiple things at once makes it impossible to know which change helped or hurt.
What are visual cues in recipe instructions?
Visual cues are descriptive phrases like "golden brown," "firm to the touch," or "pulling away from the sides of the pan" that tell cooks what to look for rather than relying solely on timing. They make recipes more accessible to beginners and more reliable for everyone.
How does micro-batching help with recipe testing?
Micro-batching means testing ingredient tweaks on a small portion of the full recipe, which reduces waste and lets you run more test rounds quickly without the cost of full-batch testing each time.